
Getting Started
Installation
This small guide will help you get your new plugin up and running in just a few minutes.
First of all, you need to download the plugin file and unzip it (if you're reading this, you've probably done so already). Now you need to do one of the following:
- Option A:
- In the WordPress administration panel, open the "Plugins -> Add new -> Upload" page.
- Select and upload the "theia-sticky-sidebar.zip" file.
- Option B:
- Unzip the "theia-sticky-sidebar.zip" archive into your WordPress plugins folder (located at "/wp-content/plugins/").
- Open your browser and go to your WordPress admin panel.
- Open the "Plugins -> Installed plugins" page and activate the "Theia Sticky Sidebar" plugin.
For customizing the plugin, open the "Settings -> Theia Sticky Sidebar" page.
Configuration
After installing and activating the plugin, you should open your homepage and check if the plugin works out-of-the-box. Just scroll down and see if the sidebar remains permanently visible. If it doesn't, you should follow these next steps.
What we need to do is tell the plugin exactly what HTML element represents the sidebar. For that we're going to use Google Chrome, which is available on all major platforms (Windows, Mac OS and Linux). We're going to use the default WordPress Twenty Twelve theme as an example.
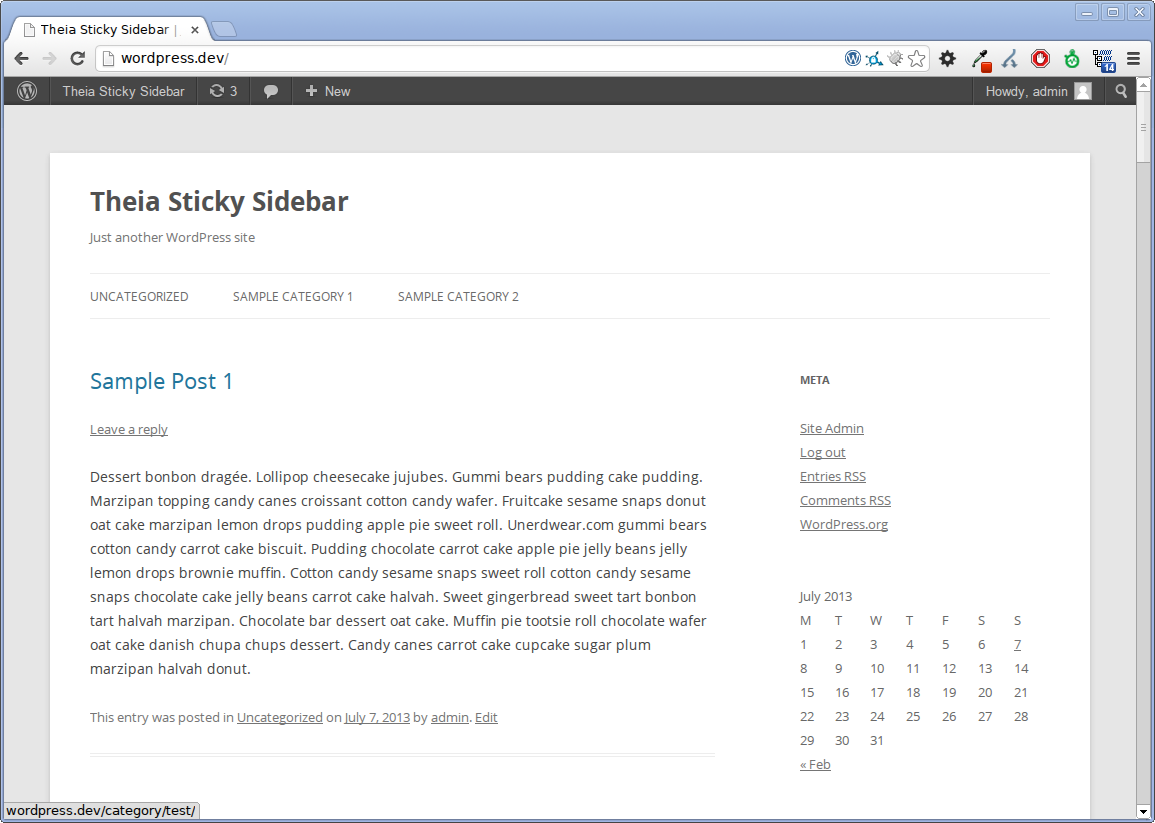
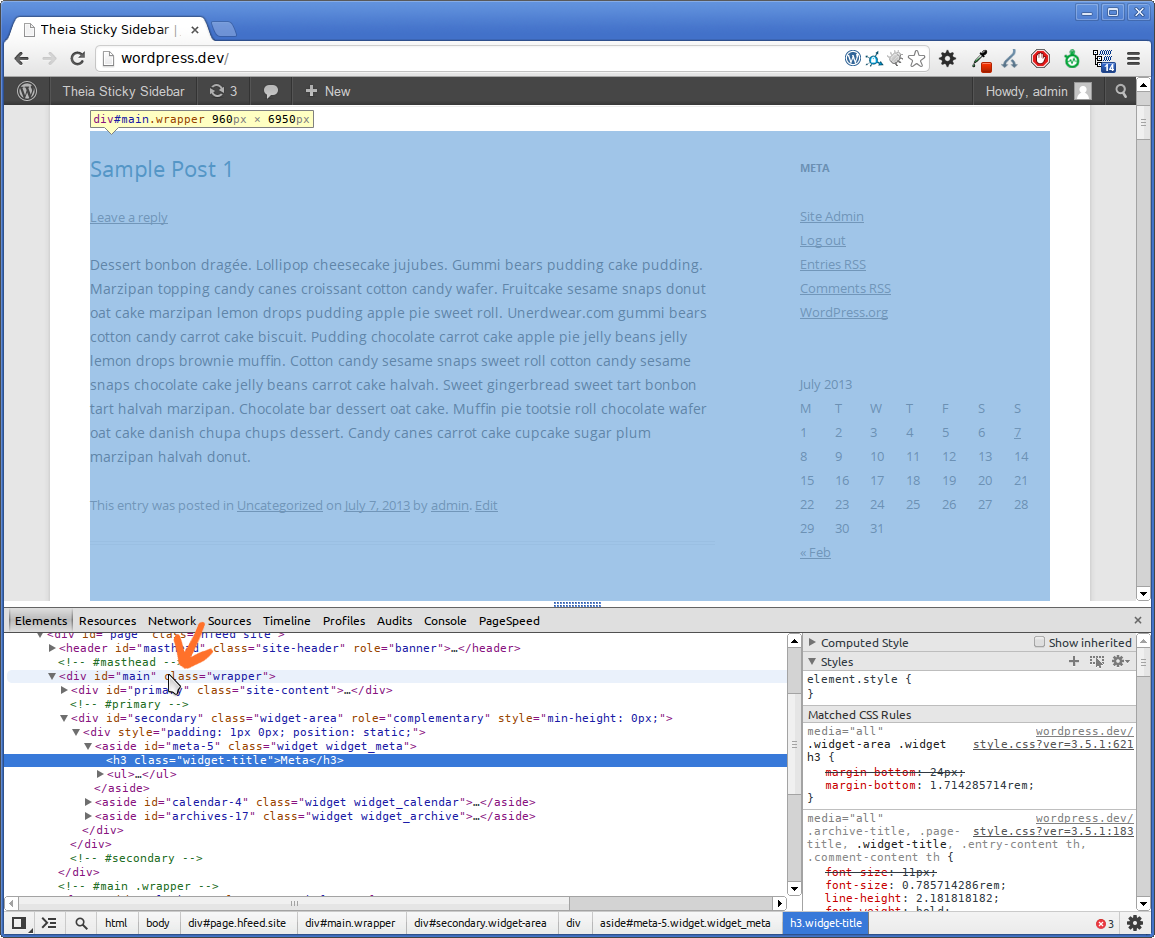
- First, open your homepage in Google Chrome. It should look something like this:
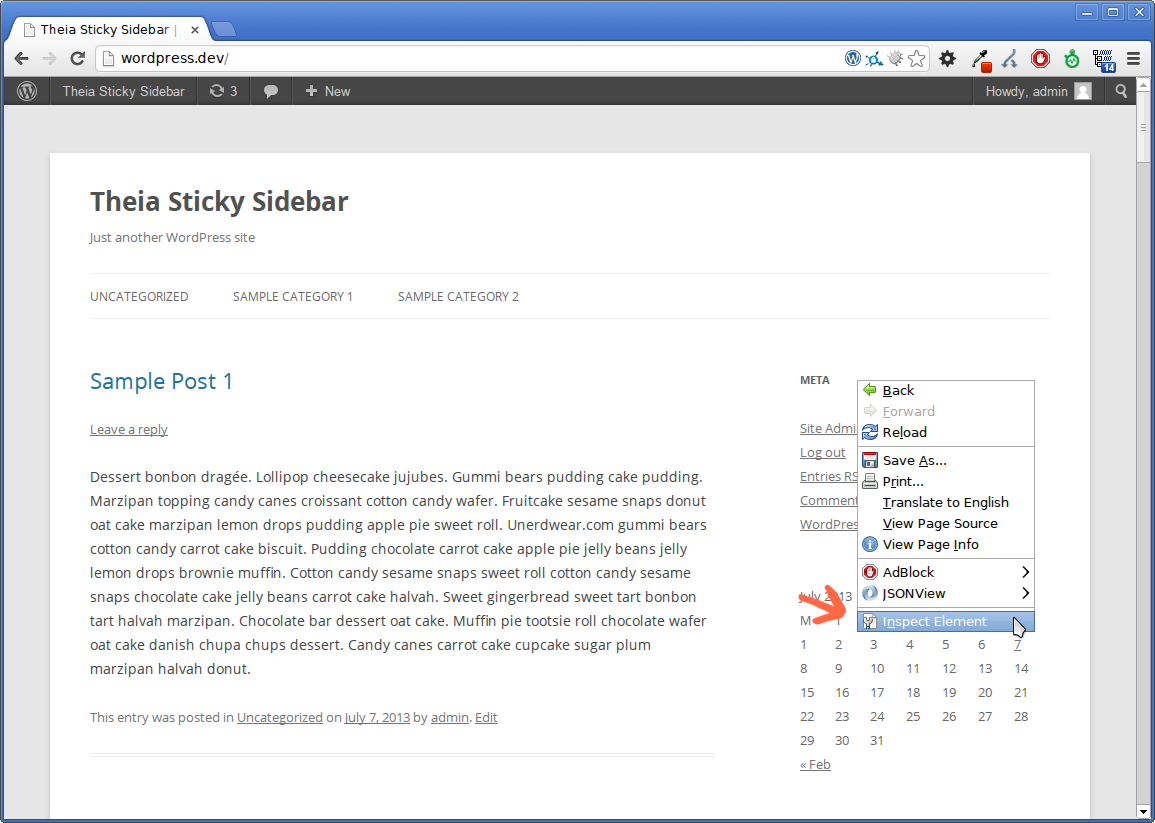
- Now locate the sidebar and right-click on it. A menu should pop-up. Select "Inspect Element".
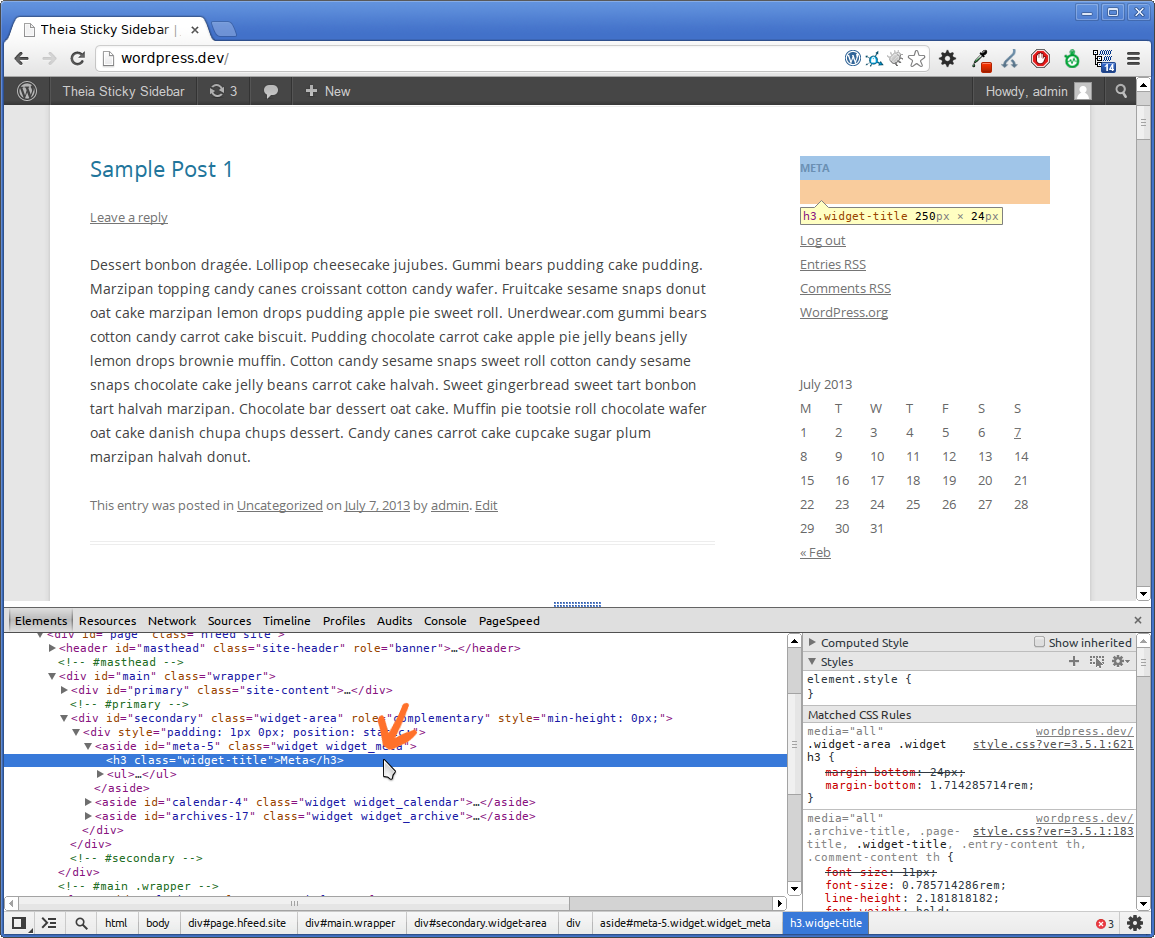
- The Developer Tools should now be displayed on the bottom, and the element you've right-clicked on should be selected. In this case, we've selected the sidebar's "Meta" heading.
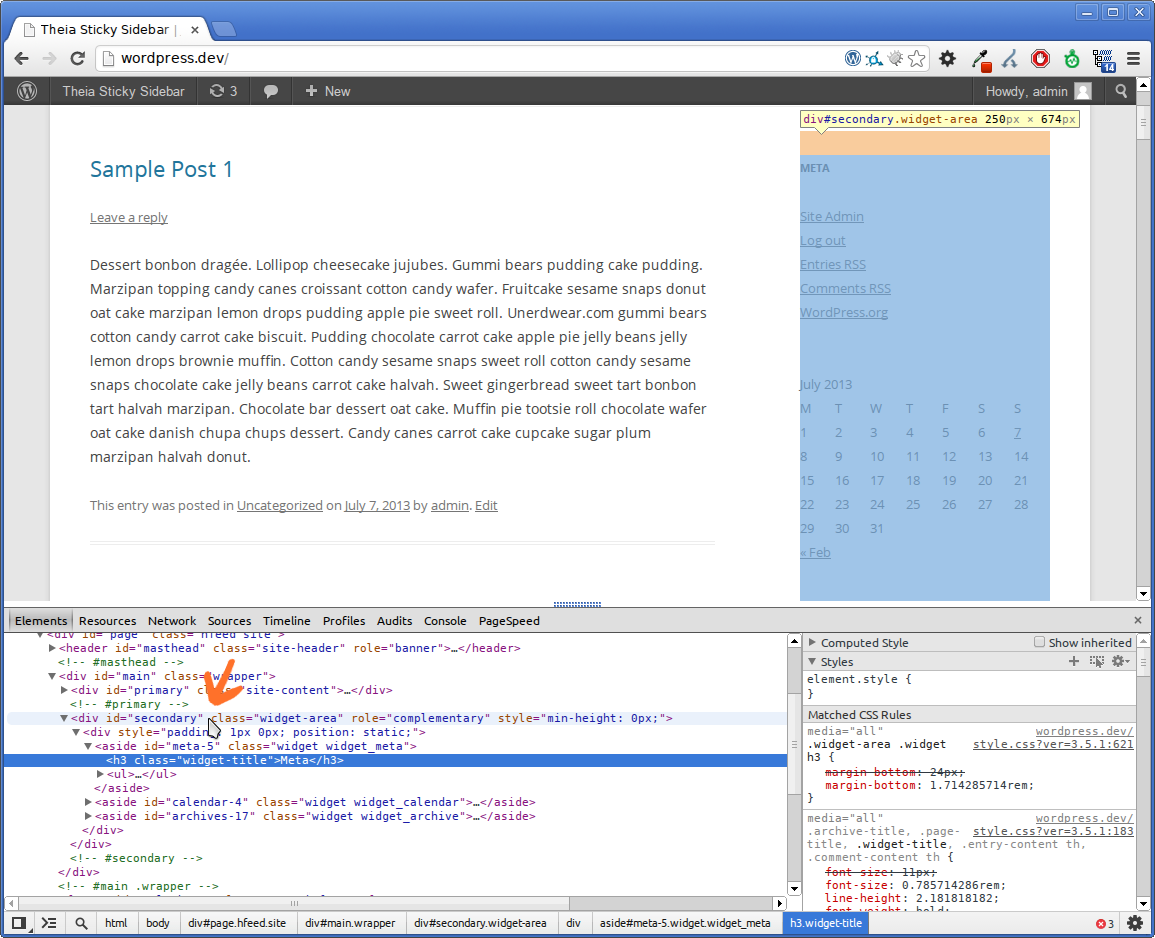
- In the Developer Tools from the bottom of the window, search upwards for the sidebar element by moving your mouse. The elements you're hovering over will be highlighted. Search for the first parent element that highlights the entire sidebar. It usually has the ID or class name of "sidebar", "sidebar-right", "secondary", etc..
In this example, the sidebar has the ID of "secondary". To identify it, we can use the "#secondary" selector (notice the "#" in front of it, meaning this is an "ID"). If this sidebar didn't have an ID, we could have used it's "widget-area" class to identify it, like so: ".widget-area" (notice the "." in front of it, meaning this is a "class").
- Now we must do the same thing to locate the container of the page. This is the first parent element that contains both the sidebar and the actual content of the site. It usually has the ID or class name of "main", "main-container", etc.. In this example, we're going to use the "#main" selector to identify it.
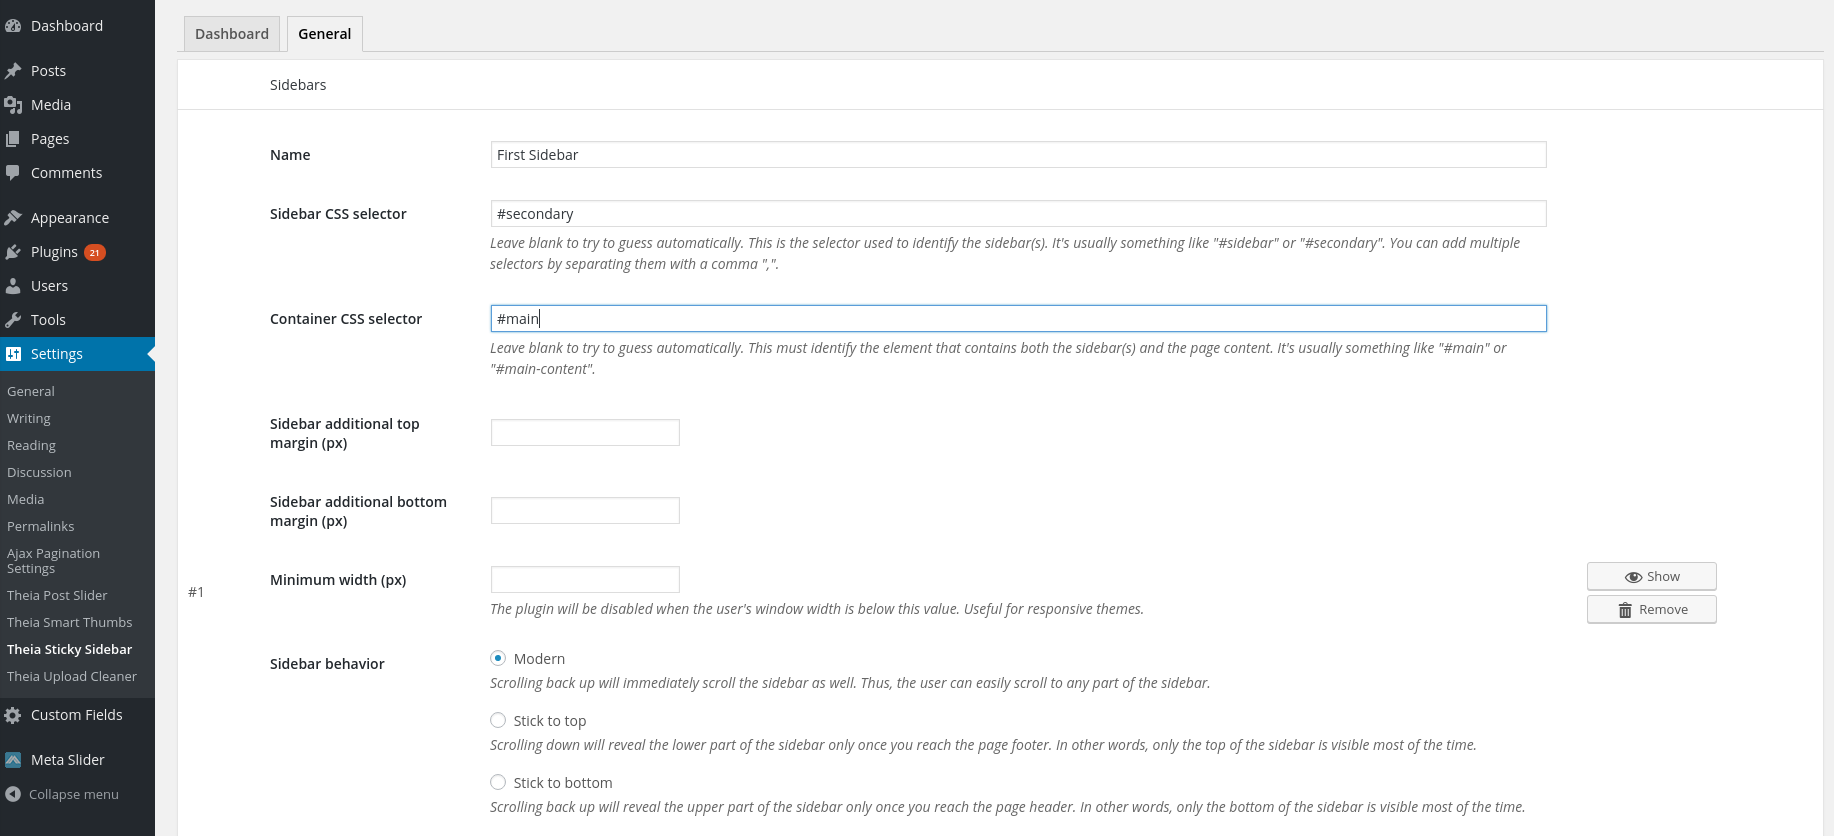
- Open the plugin's settings page -> General tab from the administration panel and click on the 'Add another sidebar' button.
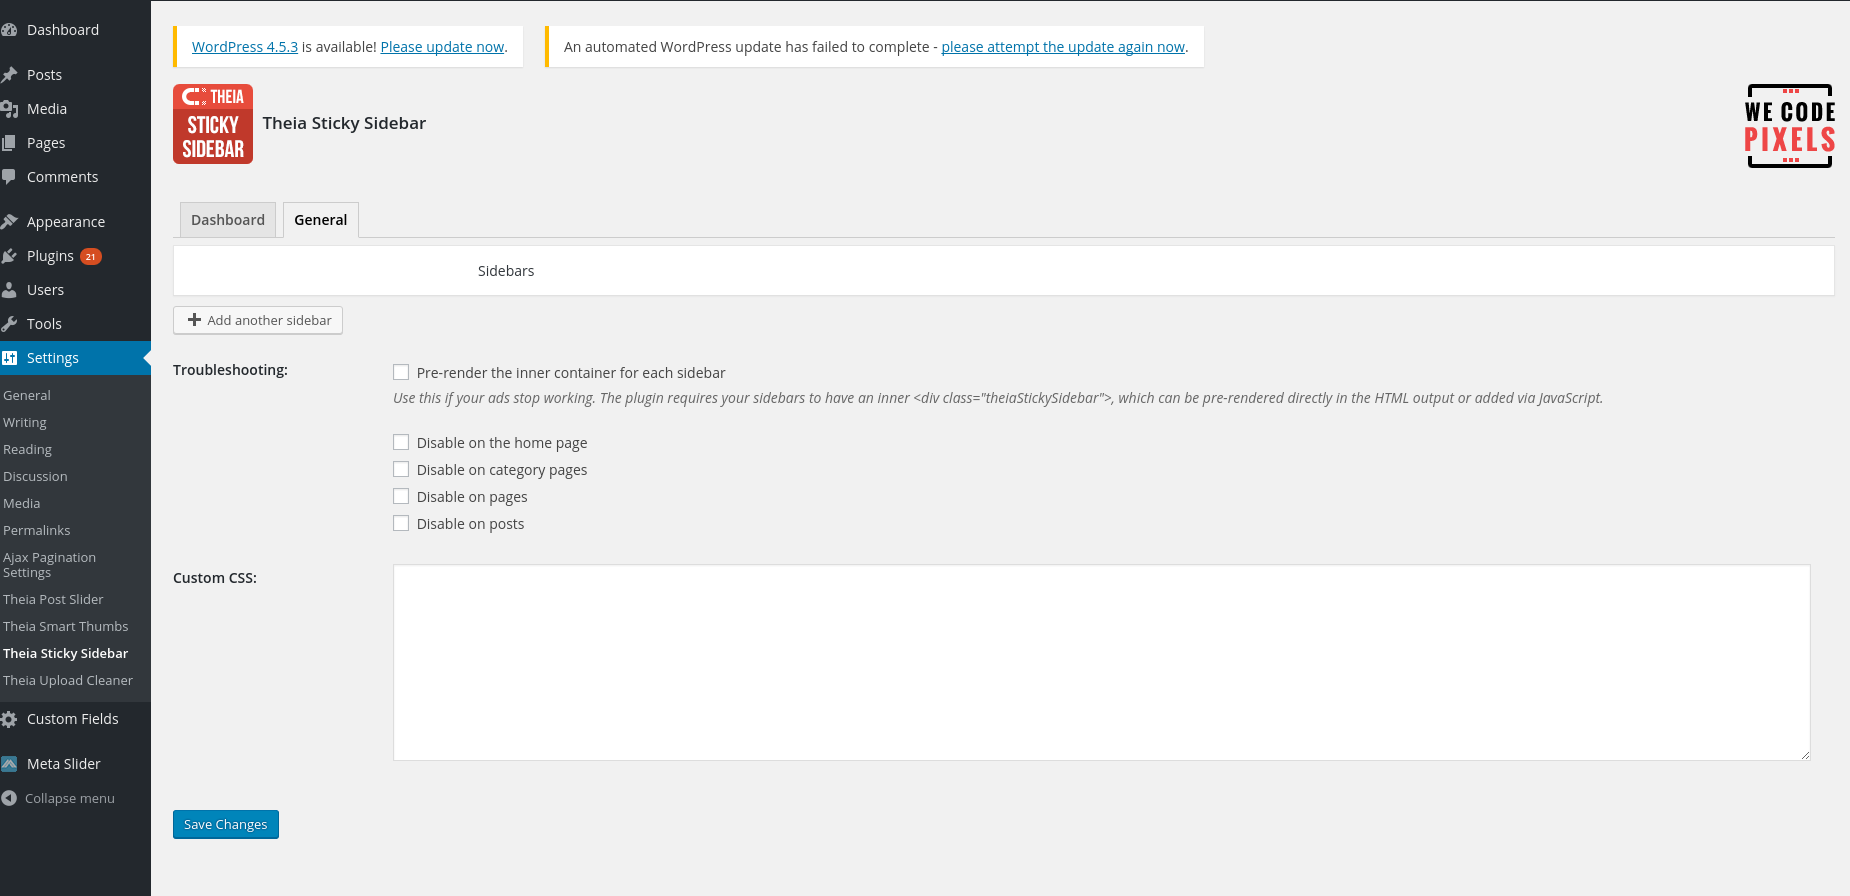
- Finally enter the "Sidebar CSS selector" and the "Container CSS selector". In this case, we have "#secondary" and "#main".
Note that if you have any issues, you can send me an email with your website address and I'll find these selectors for you.
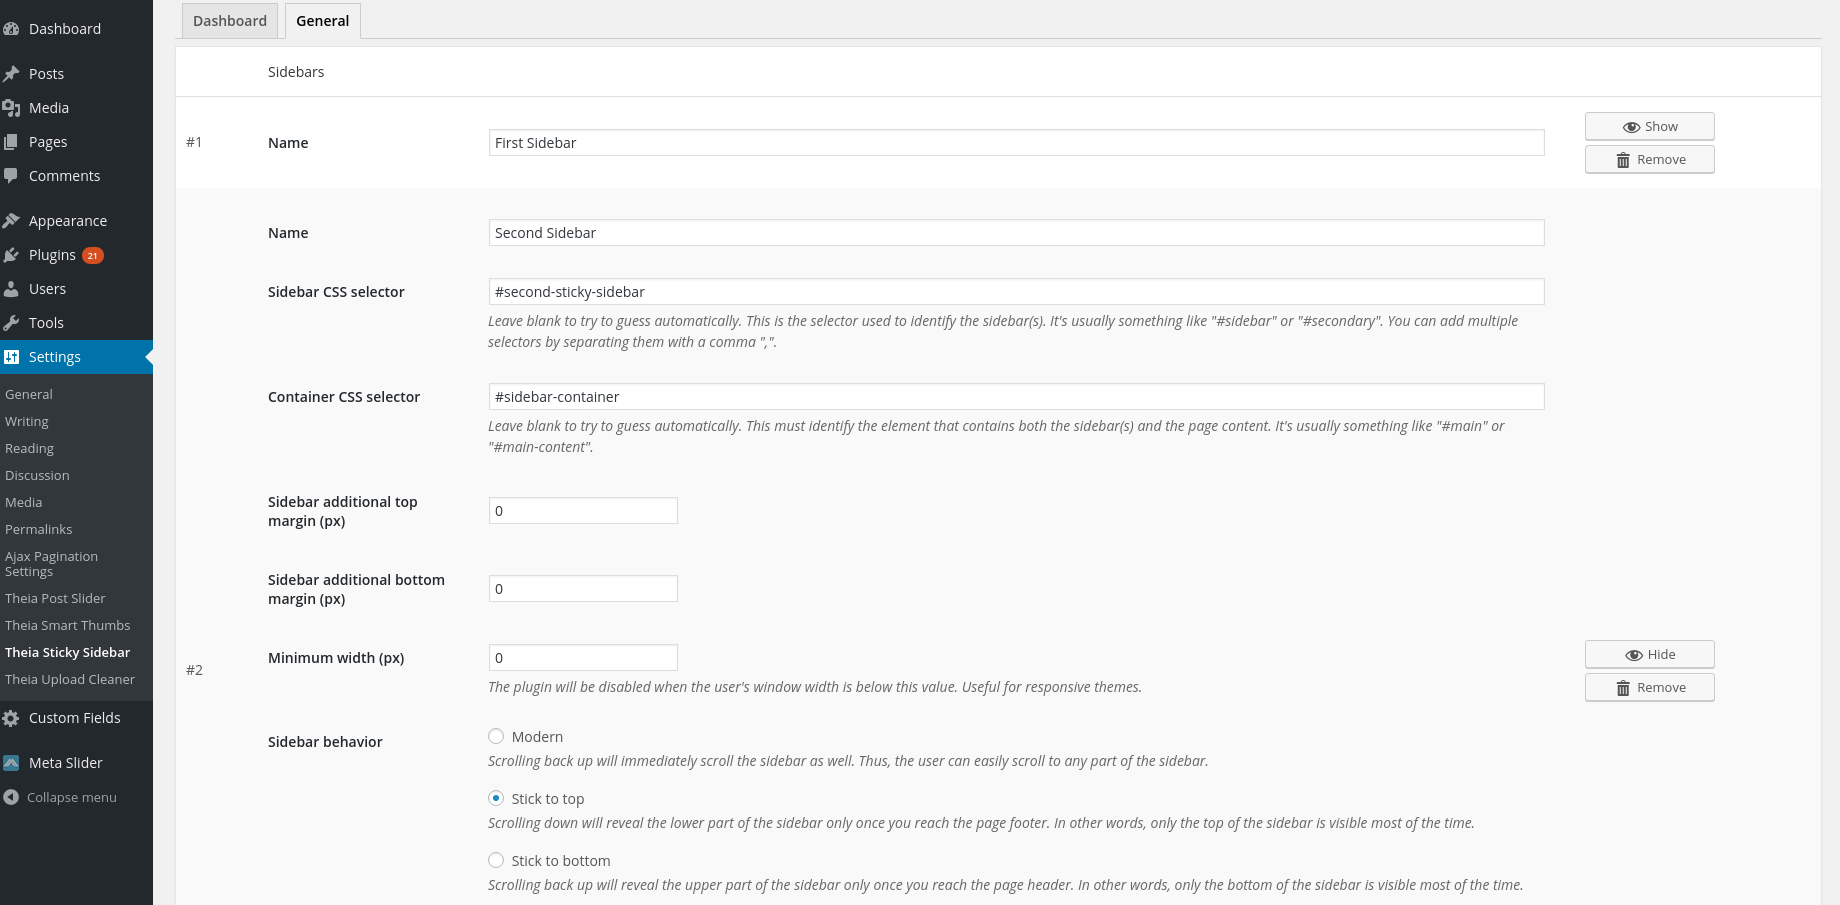
Multiple Sticky Sidebars
You can have multiple sticky sidebars in your website, either on different pages or on the same page (usually in different containers). This functionality can be implemented by using the 'Add another sidebar' button and following the same steps described in the Configuration section.
Advanced Usage
<div class="wrapper">
  <div class="content">
    <div class="theiaStickySidebar">
    ...
    </div>
  </div>
  <div class="sidebar">
    <div class="theiaStickySidebar">
    ...
    </div>
  </div>
</div>
In order for Theia Sticky Sidebar to work, your website's HTML structure should be similar to the following:
Note that the inner "theiaStickySidebar" divs are optional, but highly recommended. If you know some HTML basics you can edit your theme files and add them yourself (note that we strongly recommend doing this inside a child theme). Otherwise, the JavaScript plugin will automatically create them for you, but this can be problematic if you are using ads or iframes, since they will be moved around in the DOM and as a result will get reloaded.
Themes that work out-of-the-box
A number of themes have already been tested and work out-of-the-box without the need for further configuration. Here is a partial list:
- Attitude by Theme Horse
- Avada by Theme Fusion
- Blue Diamond by Goodlayers
- BoldR Lite WordPress Theme by Iceable Themes
- Bolid Theme by Vergo
- Boutique Shop by quitenicestuff
- Bretheon by Muffin group
- Catch Box by Catch Themes Team
- Churchope by themoholics
- Clean Retina by Theme Horse
- Complexity by Jason Bobich
- Coraline by Automattic
- Custom Community by Themekraft
- Customizr by nikeo
- Destro by ThemeAlley.com
- deTube by Cloud Stone
- Directory by AitThemes
- discover by Manishg
- DynamiX by NorthVantage
- Eclipse by CyberChimps
- Ego by UDTHEMES
- Evermore by Pexeto
- EvoLve by Theme4Press
- Expound by Konstantin Kovshenin
- Flexform by Swift Ideas
- Food Recipes by 960Development
- Fundify by AppThemer
- FUZZY by PEGO
- Graphene by Syahir Hakim
- Hitched by Studio164a
- I Love It! by CosmoThemes
- iFeature by CyberChimps
- Impression by AIT-Themes.com
- INOVADO by minti
- Jarida by Mo3aser
- JPhotolio by Jegtheme
- Kaleido for WordPress by imaginem
- Kallyas by Hogash
- Kleo by Seventh Queen
- Leaf by Brad Thomas
- London Creative + by freshface
- Mantra by Cryout Creations
- Maya Shop by Your Inspiration Themes
- Mural by unisphere
- Nimble by Dream-Theme
- OneTouch by Crumina
- OptimizePress by OptimizePress & James Dyson
- PageLines by PageLines
- Parament by Automattic
- Pinboard by One Designs
- Radial Premium Theme by Orange Themes
- Responsive by ThemeID by CyberChimps.com
- Responsive Fullscreen Studio for WordPress by imaginem
- RT-Theme Seventeen by Tolga Can
- Skinizer by WPScientist
- Smart IT by ThemeMakers
- Sommerce by Your Inspiration Themes
- Sunny Blue Sky by Robert Brown
- SuperMassive by GhostPool
- Symplex by Kaptinlin
- Terra by BlueOwlCreative
- The Agency by OTOTW
- Twenty Eleven by the WordPress team
- Twenty Ten by the WordPress team
- Twenty Twelve by the WordPress team
- Twenty Thirteen by the WordPress team
- Typegrid by WPBandit
- U-Design by Andon
- Victoria by system32
- Weaver II by Bruce Wampler
- WP Opulus by Nimbus Themes
- Sterling by TrueThemes
- Enfold by Kriesi
- SimpleMag by ThemesIndep
- POST by MoonThemes
- OldPaper by thunderthemes
- SmartMag by ThemeSphere
And many more that have been added since the writing of this list.